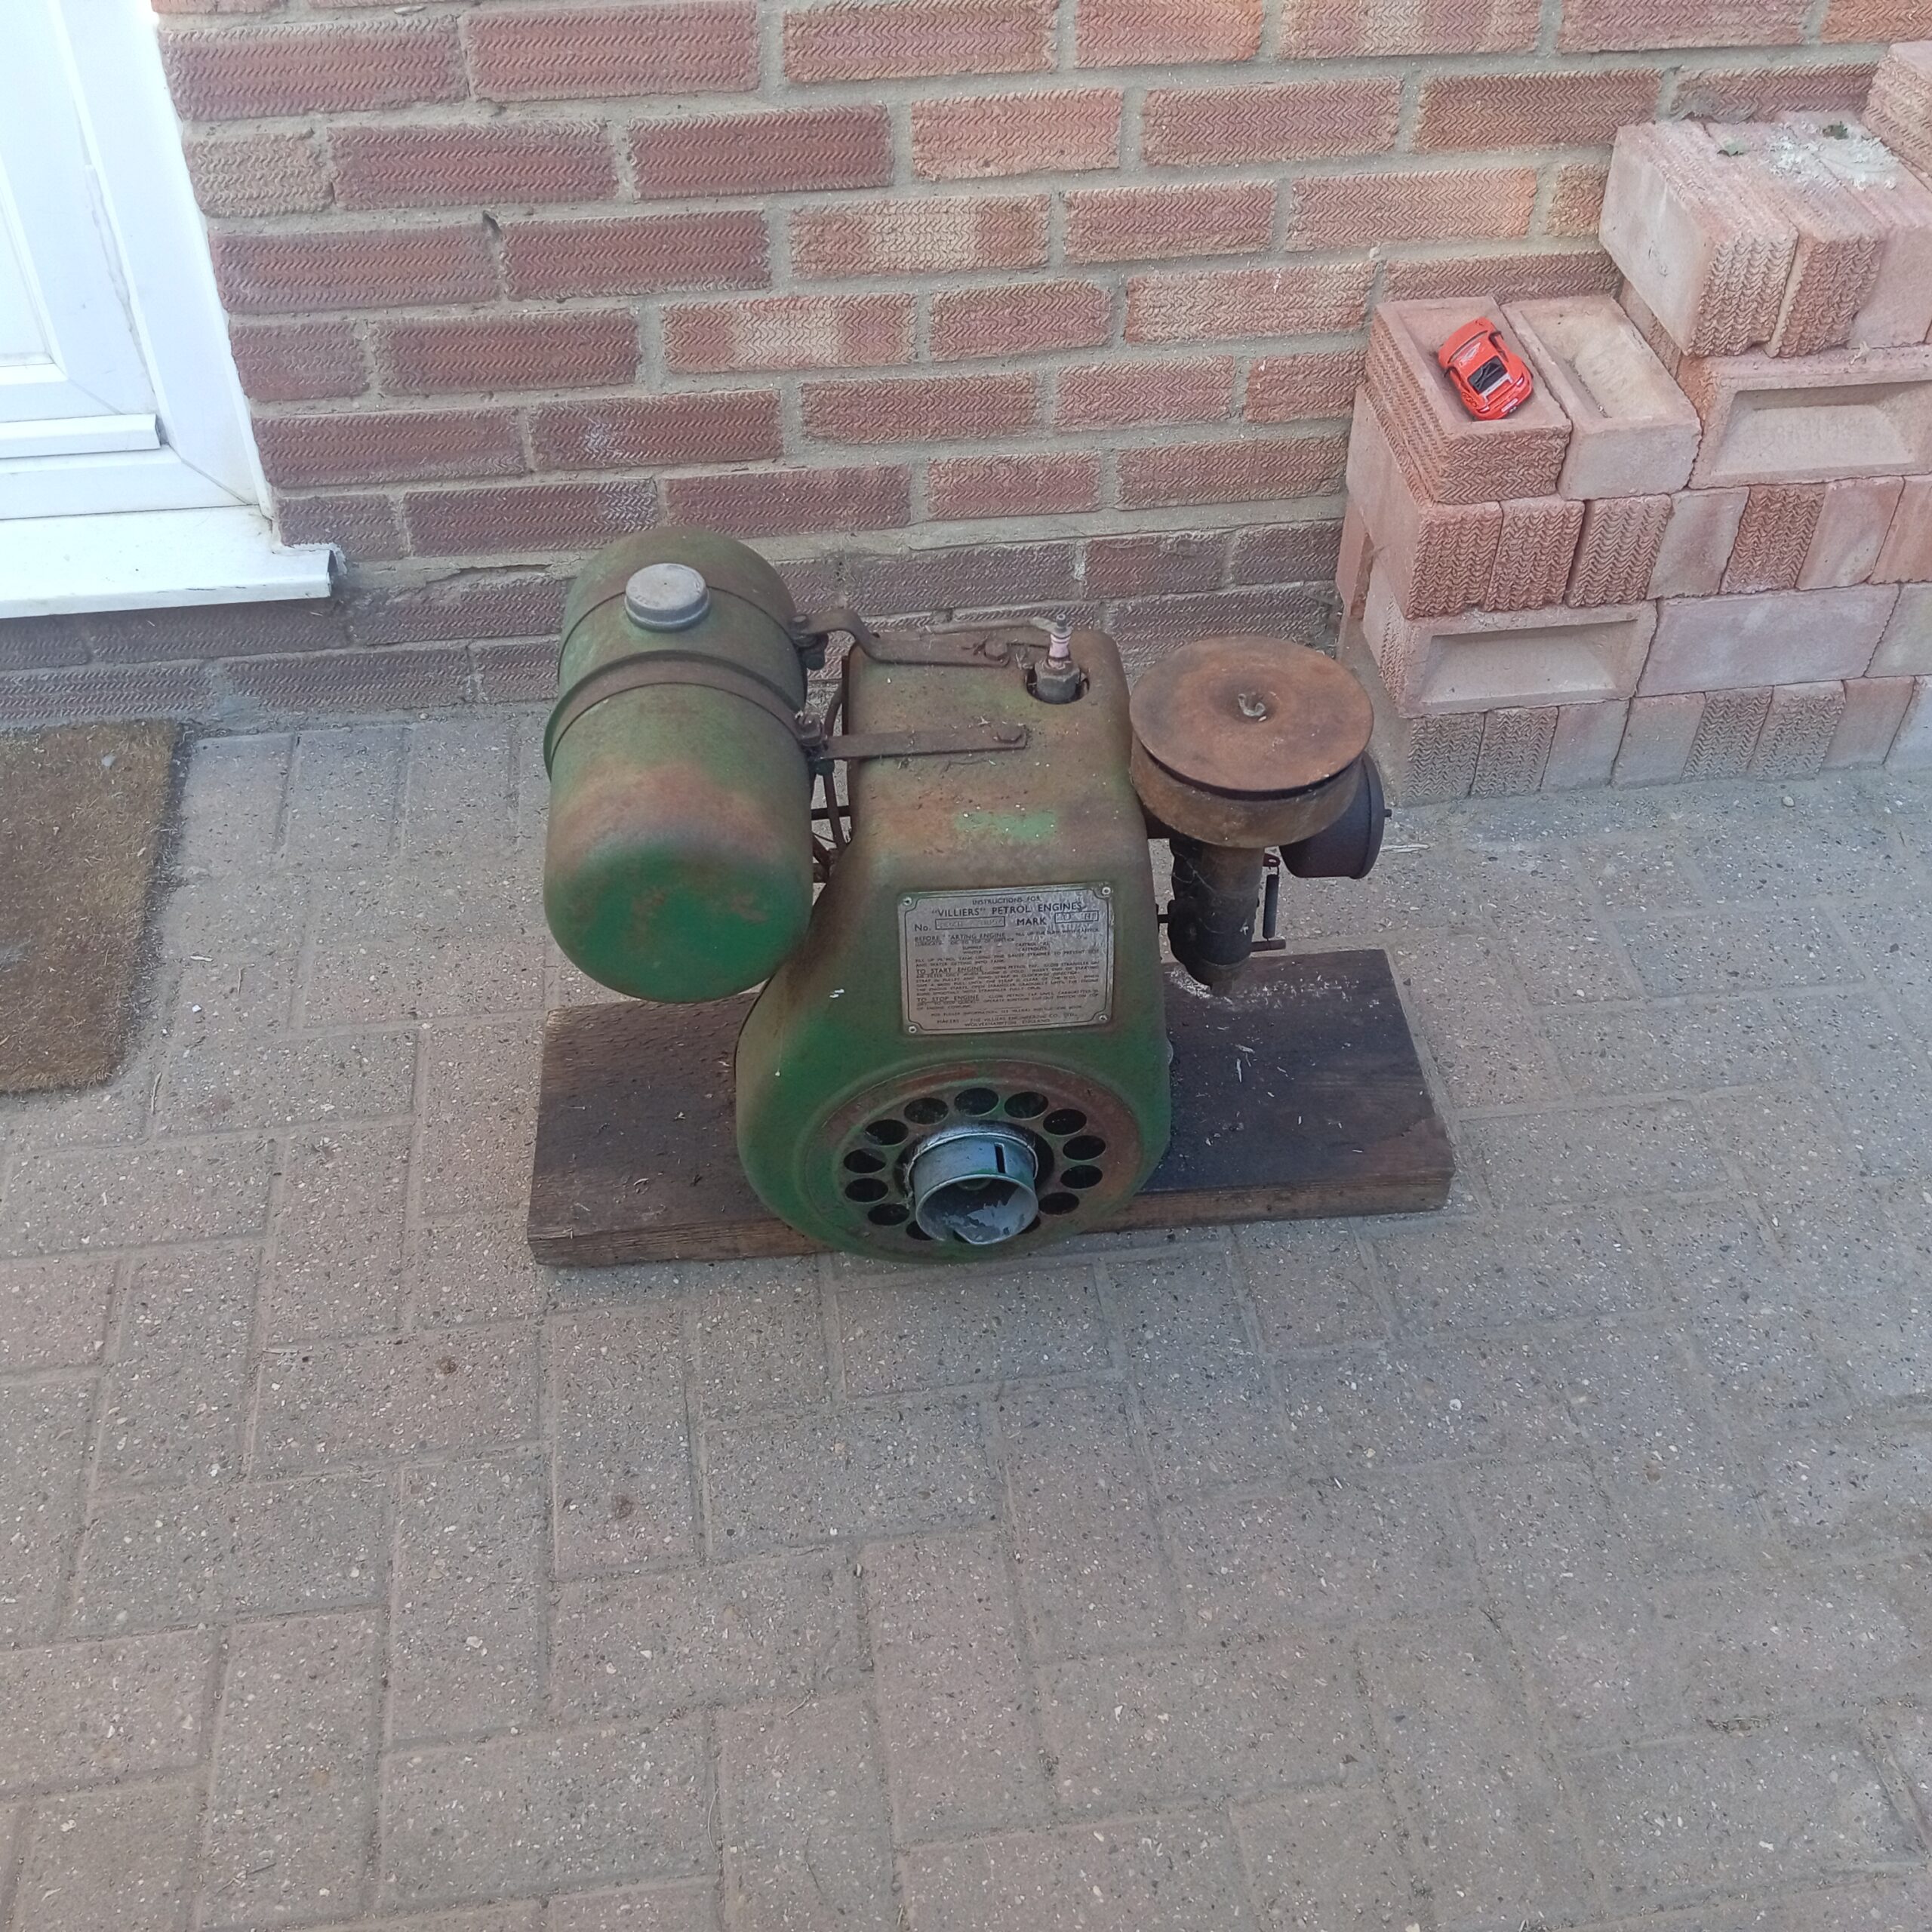
1951 VILLIERS MK20 HS 4-STROKE
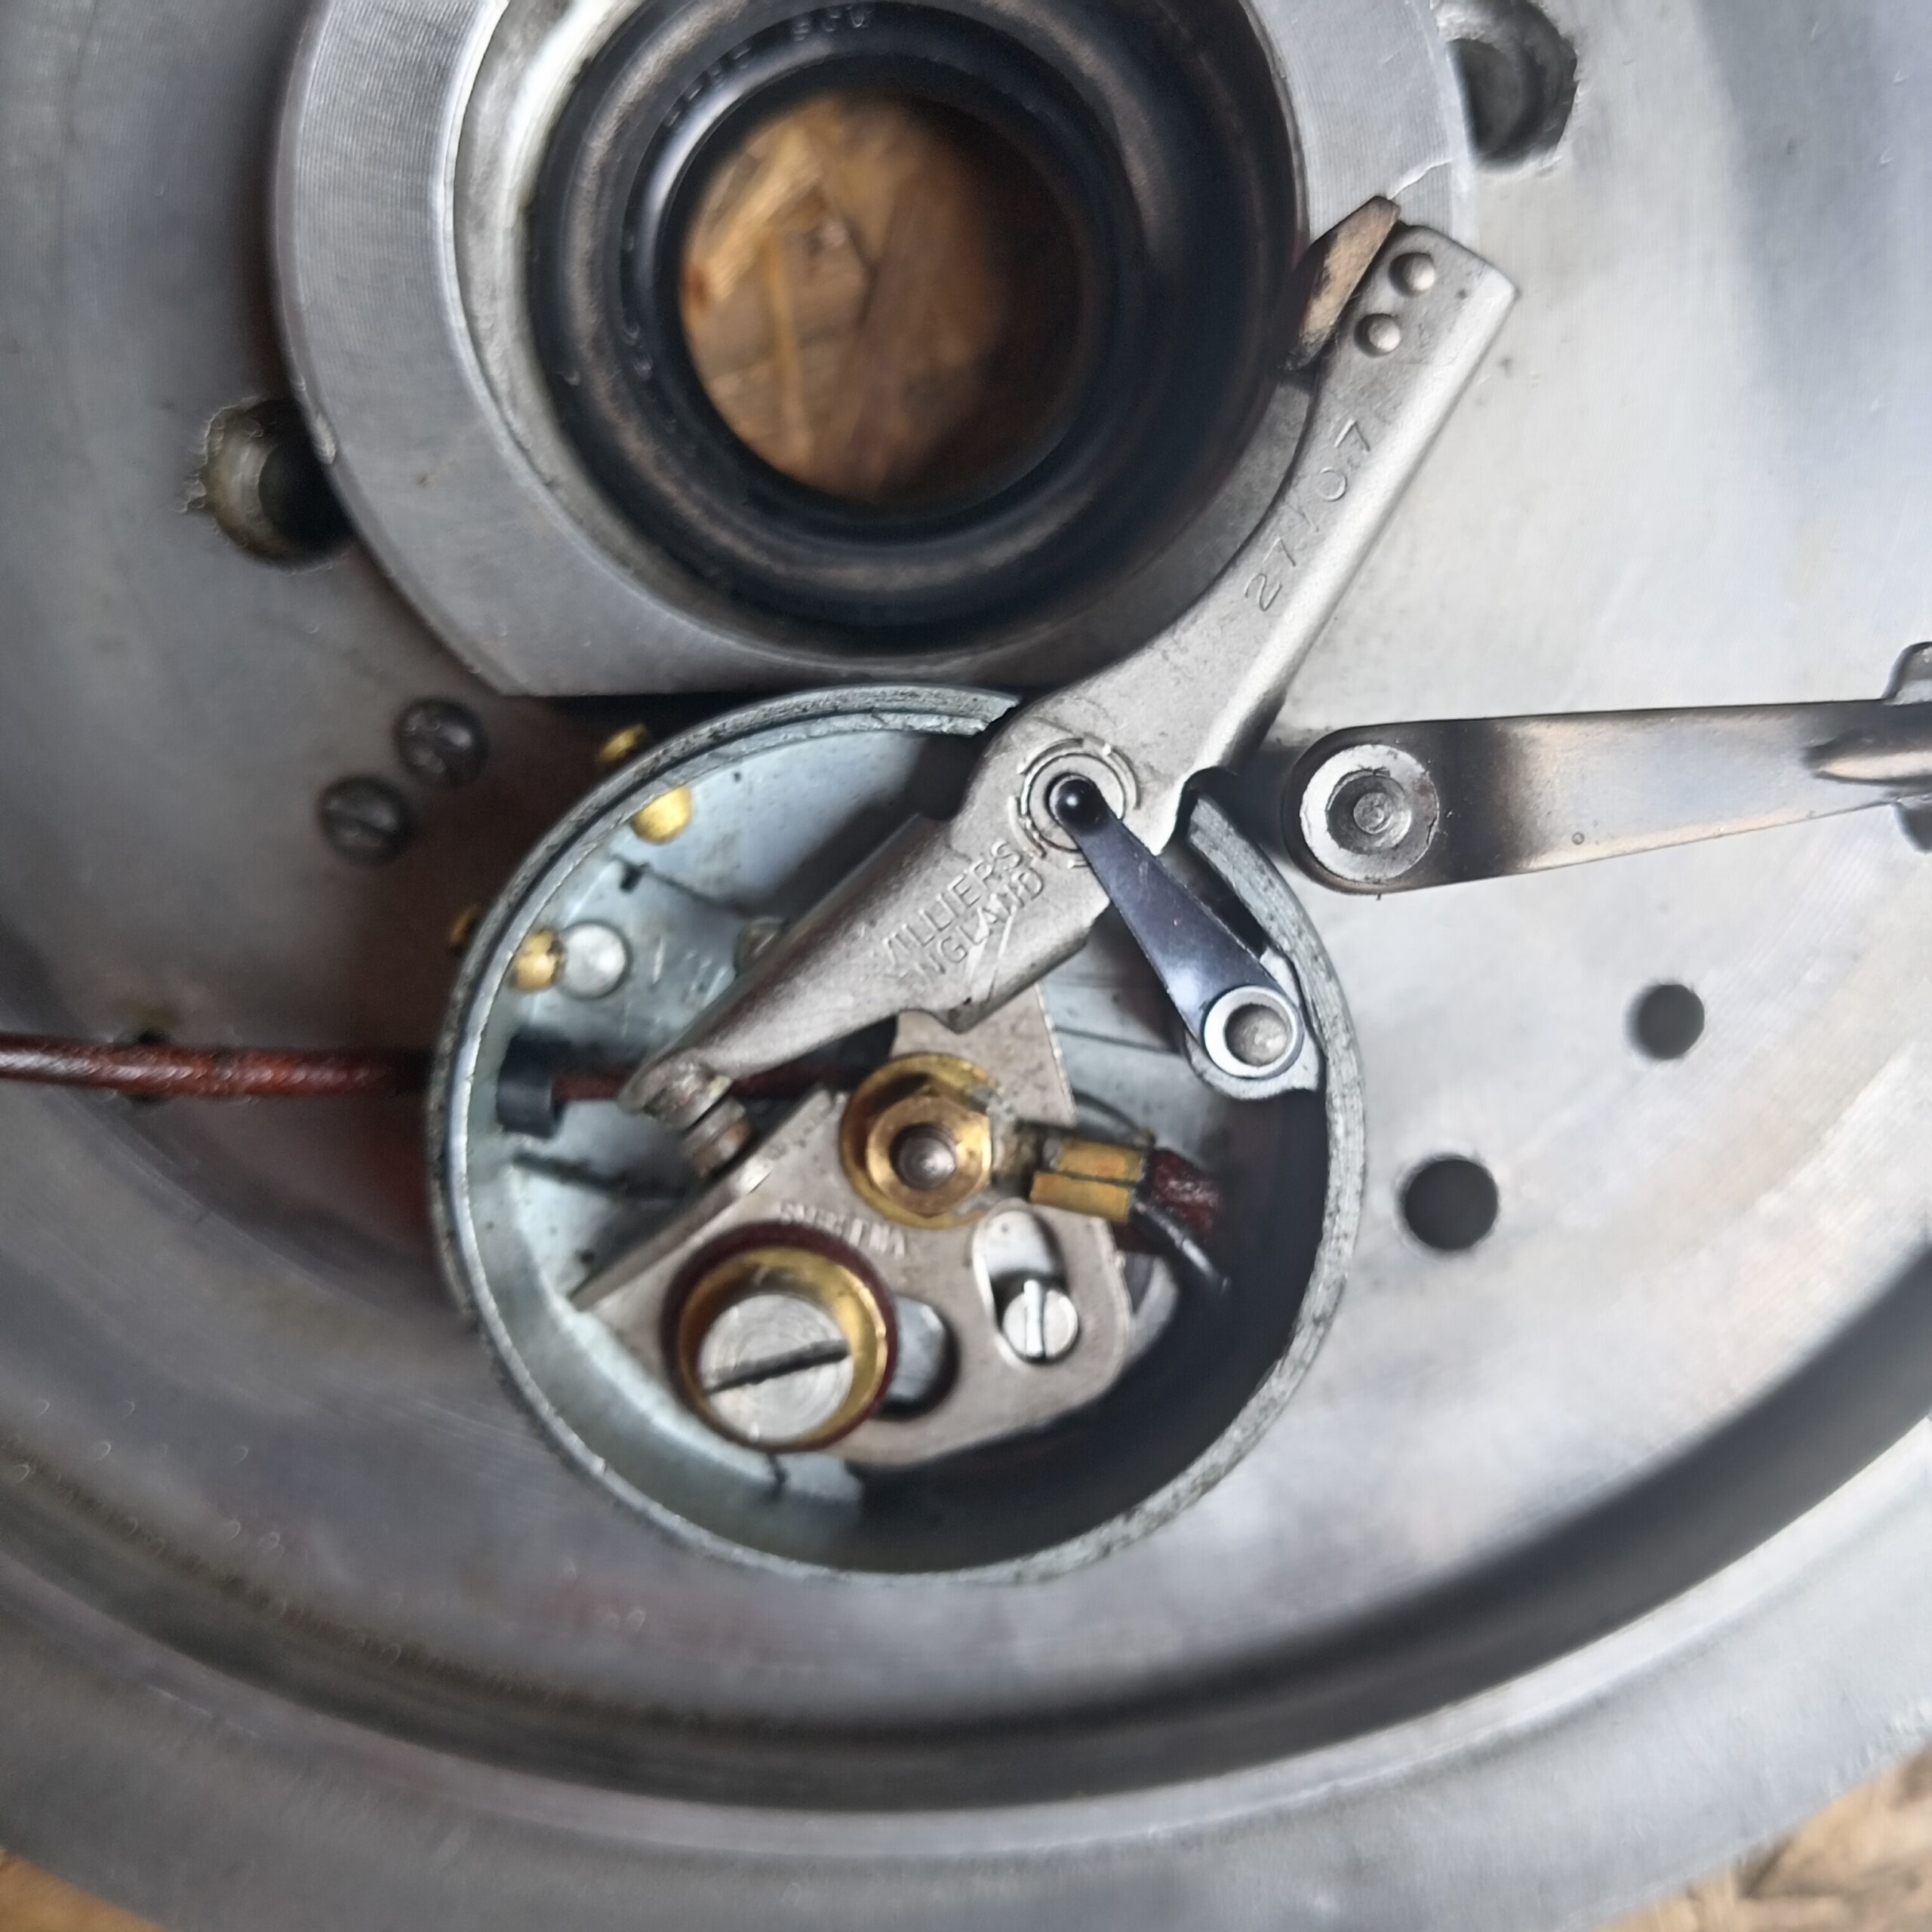
Following my previous article about my 2 stroke JAP MODEL 0, I now turn to my most recent restoration project, a 1951 Villiers mk20 HS. This was my first 4-stroke stationary engine in my collection. I picked this engine up from a chap in Norfolk who had it dry stored for several years in the back of his garden shed. Once I got the engine back to base, I done the usual, I started testing for a spark. I started by removing the flywheel cover and the magneto cover from the flywheel to access the ignition system. Once I had access to the contact breaker, I removed the brass cover plate to access the breaker points. Once I had located the breaker points, I used a piece of 600 grit wet and dry to remove any corrosion from the points. Once I cleaned the points, I took the plug out and tried testing for a spark. No luck, I tried for a while. I kept cleaning the points but zero luck. One common problem with these VILLIERS engines is after some time the original ignition coil becomes ‘open circuit’ where the current which should go to the plug arks inside the coil. So, I went onto trusty old eBay and ordered a new-old-stock coil. After a week or two the postman had delivered the new coil, so, with that off came the cowling (to remove the flywheel) and the flywheel followed shortly after.
Once the flywheel was removed, I then removed the backplate and got access to the retaining bolts that mount the ignition coil formers in place. I then removed the original coil and replaced it with a newer one. The new coil however didn’t have a dome for the HT lead graphite to seat onto so, a scrap piece of brass was turned down to the right dimensions and soldered to the new coil contact post. Once the new coil was back on the backplate, I tested the condenser and new coil to see if we had a circuit, and I did. SO, the backplate and flywheel where re-united with the engine, and I was one step closer to getting it running.
Before I got it running, I took the carburettor apart cleaning the highspeed running jet, the normal jet and the float chamber, I also cleaned some corrosion off the choke/inlet port. The carburettor was soon reassembled and put back onto the inlet manifold along with the governor levers. Once the carburettor was back on, I disassembled the fuel tap and put the whole tap body into a pot of boiling water to swell the piece of sealing cork. Once the cork had swollen, I then reassembled the fuel tap and refitted it to the fuel tank followed by the fuel pipe. I poured some petrol into the fuel tank, opened the fuel tap, put the choke on and it fired straight into life, magnificent, after several years its alive again. After then playing about with the carburettor settings for a few minutes it ran for at least 20 minuets before stopping abruptly. It lost its spark, which was a shame as the original LODGE CB3 plug had failed. I then replaced this with an NGK AB-6 plug. Once I replaced the plug, it ran faultlessly.
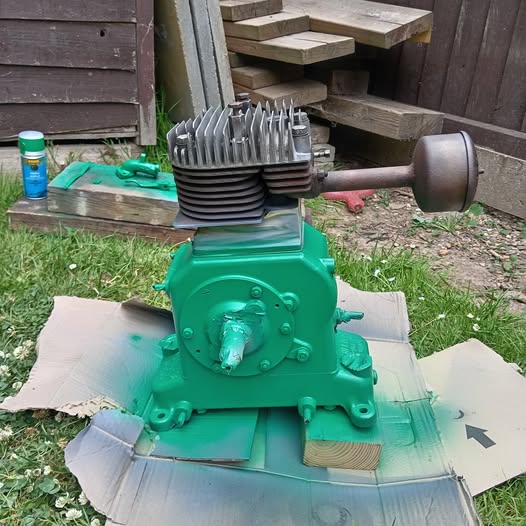
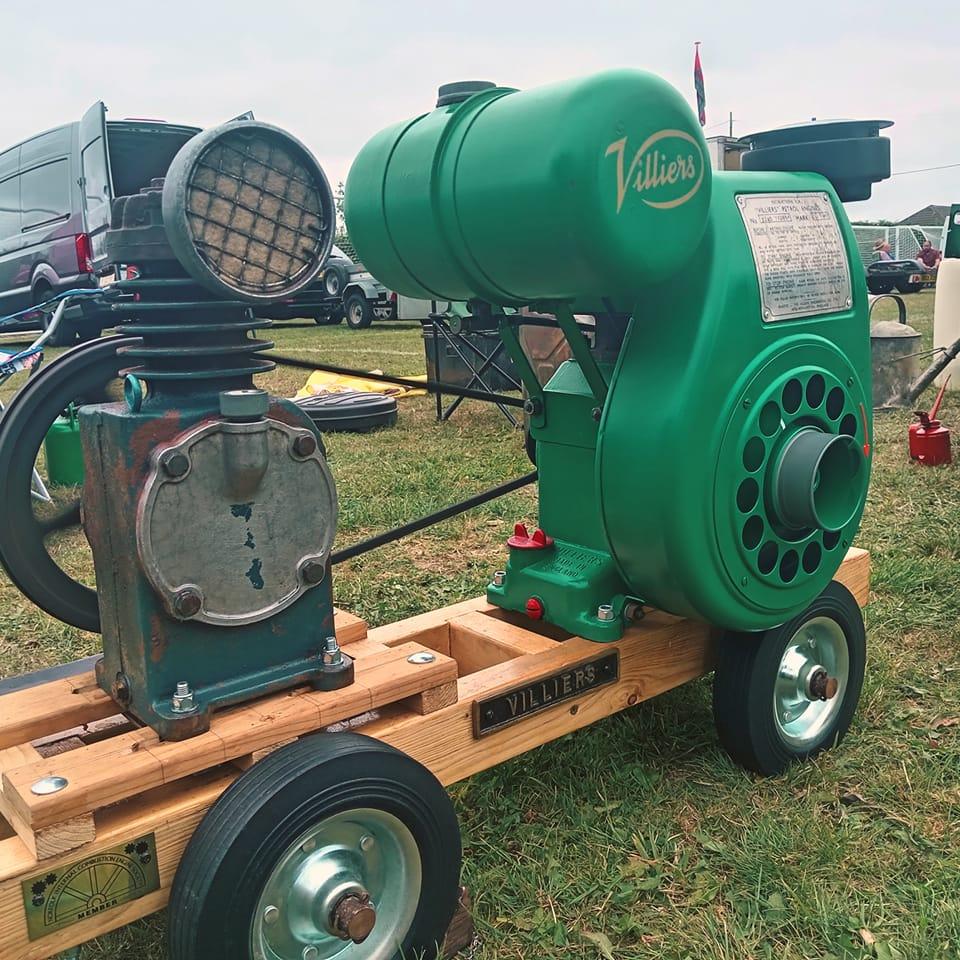
So, onto the painting, after much thinking and head-scratching I decided to strip the whole engine down removing the fuel tank, fuel tank mounts, cowling, flywheel, backplate, carburettor, inlet manifold, oil drain bungs and oil filler/oil dipsticks. Once the whole engine was down to the block, I spent the best part of 2 weeks cleaning individual parts with a wire wheel in the drill and a wire brush, the majority of the original paint flaked of, especially the aluminium crankcase so the cleaning process wasn’t too difficult. The aluminium crankcase, carburettor body and cylinder head where badly corroded so these required deeper cleaning with a wire brush. Once everything was cleaned, I etch primed everything (Except the fuel tank) and the majority of the parts were aluminium. Once the etch primer had cured for 24-48 hours, I then proceeded to get a coat of green on it. I used HYCOTE ford Modena green for the fuel tank, crankcase, inlet manifold, cowling and the sump. Once the green had cured, I then started to reassemble the engine back together a piece at a time. I decided to paint the governor levers, oil drain plugs and dipsticks red to stand out more at lacquered them using clear dry lacquer. The fuel tank was later sprayed with clear dry 2k lacquer (Petrol resistant). The engine was then fully restored back to working order mid July 2025 and It was later put on a homemade trolley driving a vintage ‘BROOMWADE’ air compressor and saw its first rally at Horsham St faiths in August 2025.
Many Videos are featured on my YouTube Channel @norfolkheritageengines.
You must be logged in to like this post.
Country: GB