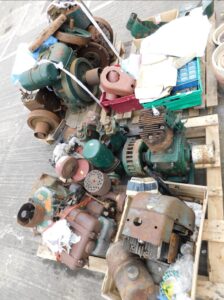
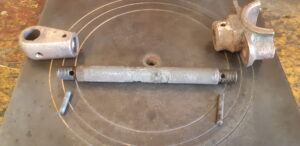
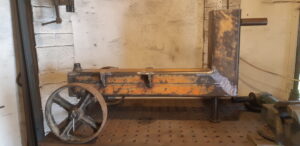
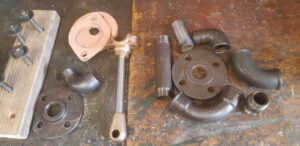
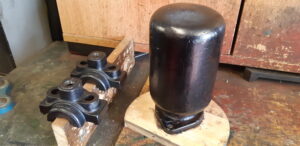
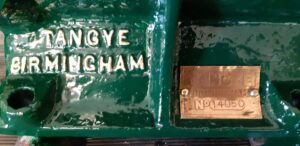
This pump was first spotted in a mixed lot in an online auction catalogue. Look closely, the body of the pump is in the middle of the front pallet, the pulley and crank at the top left of the back pallet.
I am always on the lookout for Tangye items for my collection so this was worth pursuing. The concern was that the main body of the pump was in one lot, and the crank and pulley was stacked on another pallet in a second lot. After a lot of discussion with a friend and fellow collector we decided that, as there were several items in both lots that he wanted he would try to buy it all at the sale. Luckily, he was successful, and once collected and sorted it was found that the pump was complete. I said I would have it, and a deal was struck for a swap deal for some other engine spares I had on my shelf. I first saw the pump when I collected it at the Tractorfest show, and at first glance all looked good. The pump was complete although there seemed to be a lot of rust around the gland and piston…
The pump was dismantled on the show field on the Sunday afternoon, partly as I was interested to find out what state it was in and mostly so I could lift it into my van easily to get it home. It was mixed news, the valves and bearings all seemed perfect whereas the piston and gland ring were comprehensively stuck with rust and grot and appeared to have been soaked in all manner of glop to try and free it up. I suspect that this was another survivor from the batch of new old stock units that was recovered many years ago and had never been used, however due to the seized piston it was a failed restoration attempt. Anyhow, an interesting and challenging project I thought so it came back to the workshop.
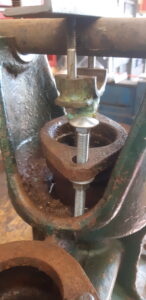
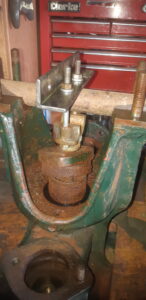
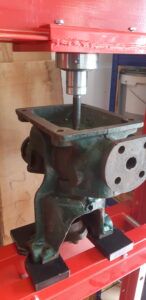
The first job was the stuck gland ring and piston, if they could not be separated the project was a non-starter. With the pump on the bench, I made up a crude puller with a round bar across the main bearings to apply some pull to the piston and rod. The gland ring was carefully jacked off the piston using a couple of long bolts. This was the first success as this is quite a thin casting and I didn’t want to break the lugs off. The conrod was tensioned up as much as I dared without causing any distress to the bronze big end and left to soak in penetrating oil. After a few days I realised that nothing was likely to move with this set up and everything still seemed to be locked up solid. Plan B required. All the studs were removed from the body casting to avoid damage and make it easier to handle. It was turned upside down, and luckily there was a plugged hole on the cylinder centre line which must have been used during the original casting and machining process. This plug was drilled out to the tapping size for 1″bsp, with the intention I could tap the hole and re-plug it later. The whole thing was then set up in the hydraulic press. Fingers crossed. I carefully pumped up the pressure on the press, 5 tons on the gauge and nothing seemed to be moving. A few taps with a copper mallet confirmed that everything still seemed solid. More penetrating oil and the pressure was increased. Approaching 8 tons of pressure and I was getting worried, mostly because it is only a cheap far-eastern press and nothing was happening. Another couple of strokes of the pump and there was an almighty bang! Careful inspection revealed that the piston had moved slightly. More oil was applied and a steady 5 tons of pressure was needed to slowly push the piston out. What a mess, there is no wonder the piston was stuck given the amount of rust and corruption that had built up around it over the years.

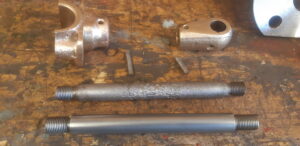
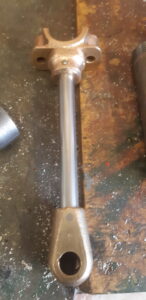
Now that it was all apart, I considered a full restoration was viable so work carried on. The hole I made in the bottom of the body was tapped and a 1″bsp plug fitted with some sealant. The conrod and small end were dismantled from the piston and cleaned up. The rod was badly pitted so a new one needed to be made. Careful examination showed that the con rod assembly had the rod screwed into the brass ends secured with taper pins. This came apart without any trouble. The piston cleaned up remarkably well or so I thought…
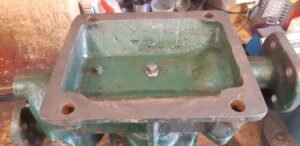
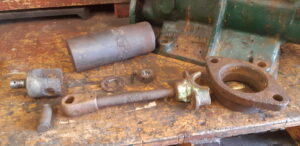
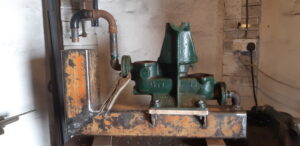
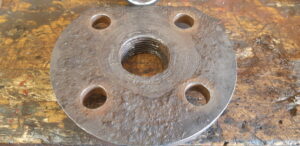
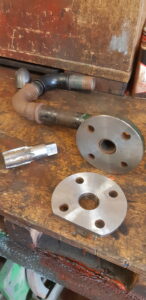
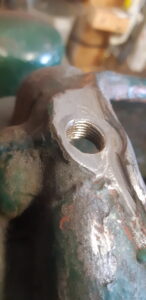
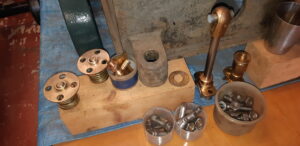
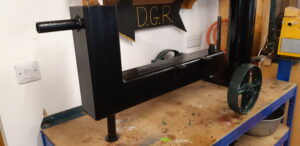
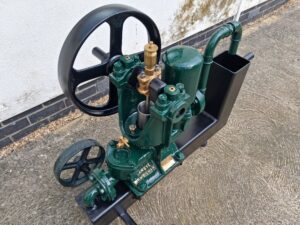
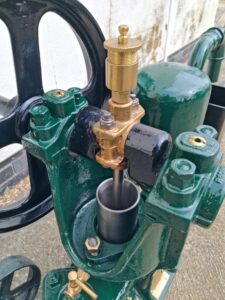
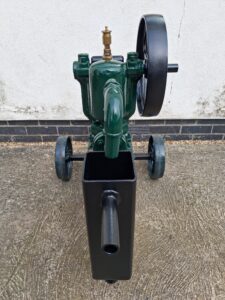
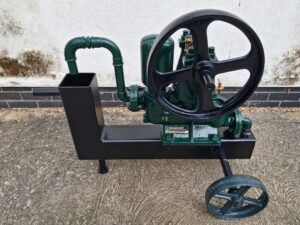
The rest of the restoration work continued. I spent quite a time experimenting with pipe layouts and trolley designs. I am a firm believer that many a nice engine or pump restoration can be spoilt with a crap trolley set up. The plumbing was to be 1″ black iron as it would have been originally, however I didn’t have anything to use as a suitable water tank. Eventually I settled on a design where the main body of the trolley also acts as the water tank in an L-shape, this saved on pipework and used a chunk of thick wall 125mm box section I already had. A suitably proportioned pair of wheels came out of my stockpile and the trolley was made. The flange faces were rusty and pitted so were machined true in the lathe. A new con-rod was made from stainless steel, once I had figured out that the ends were threaded 3/8″ BSP for reasons only known to the original machinists. The main pump body had a cast hole to drain any water leaked from the gland, this was faced up and tapped so that I could fit a brass tap to stop it dribbling everywhere. The brass bits all tidied up well and were soon ready for reassembly. All the cast iron was then cleaned up for painting, a boring phase of any restoration with a needle gun and wire brushes. This was cleaned to bare metal and treated with Kurust to neutralise any residual rust. The trolley was also painted in satin black so it was ready for the pump to be reassembled as other parts were completed.
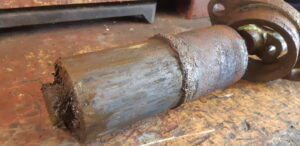
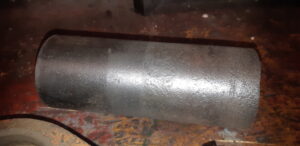
Soon everything was ready for reassembly, until I picked up the piston from the back of the bench and saw that it was still corroding despite a thorough clean.
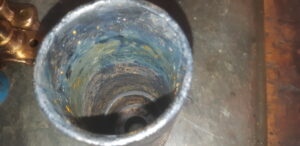
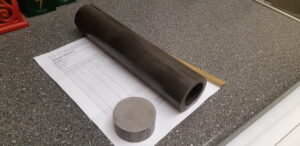
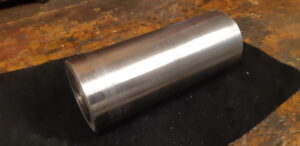
The cast iron appeared to have gone crystalline and was flaking apart. I am unsure whether this was due to whatever it had been soaked in previously in an attempt to free it off, or it was just a poor casting in the first place. There was no way that this was going to be serviceable so I had to look at making a new piston. Several ideas were considered including a new casting, machining from a solid billet or something that was commercially available. These options were just not viable for a simple water pump. In the end after some careful measurement, I managed to find a suitable piece of thick wall seamless hydraulic tubing online (Search for M-Machine Metals, Darlington, they are great!) from which the piston skirt could be made with a chunk of steel bar machined and welded in the bottom to from a new piston. I didn’t have the capacity in my lathe to machine this, thanks to my friend Martin for turning this up so I could weld it together. This completed the jigsaw and the freshly repainted pump could be rebuilt. Everything went back together without any issues which was a relief given the amount of work that had been done.
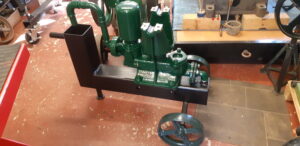
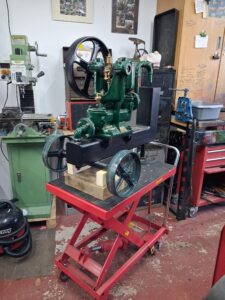
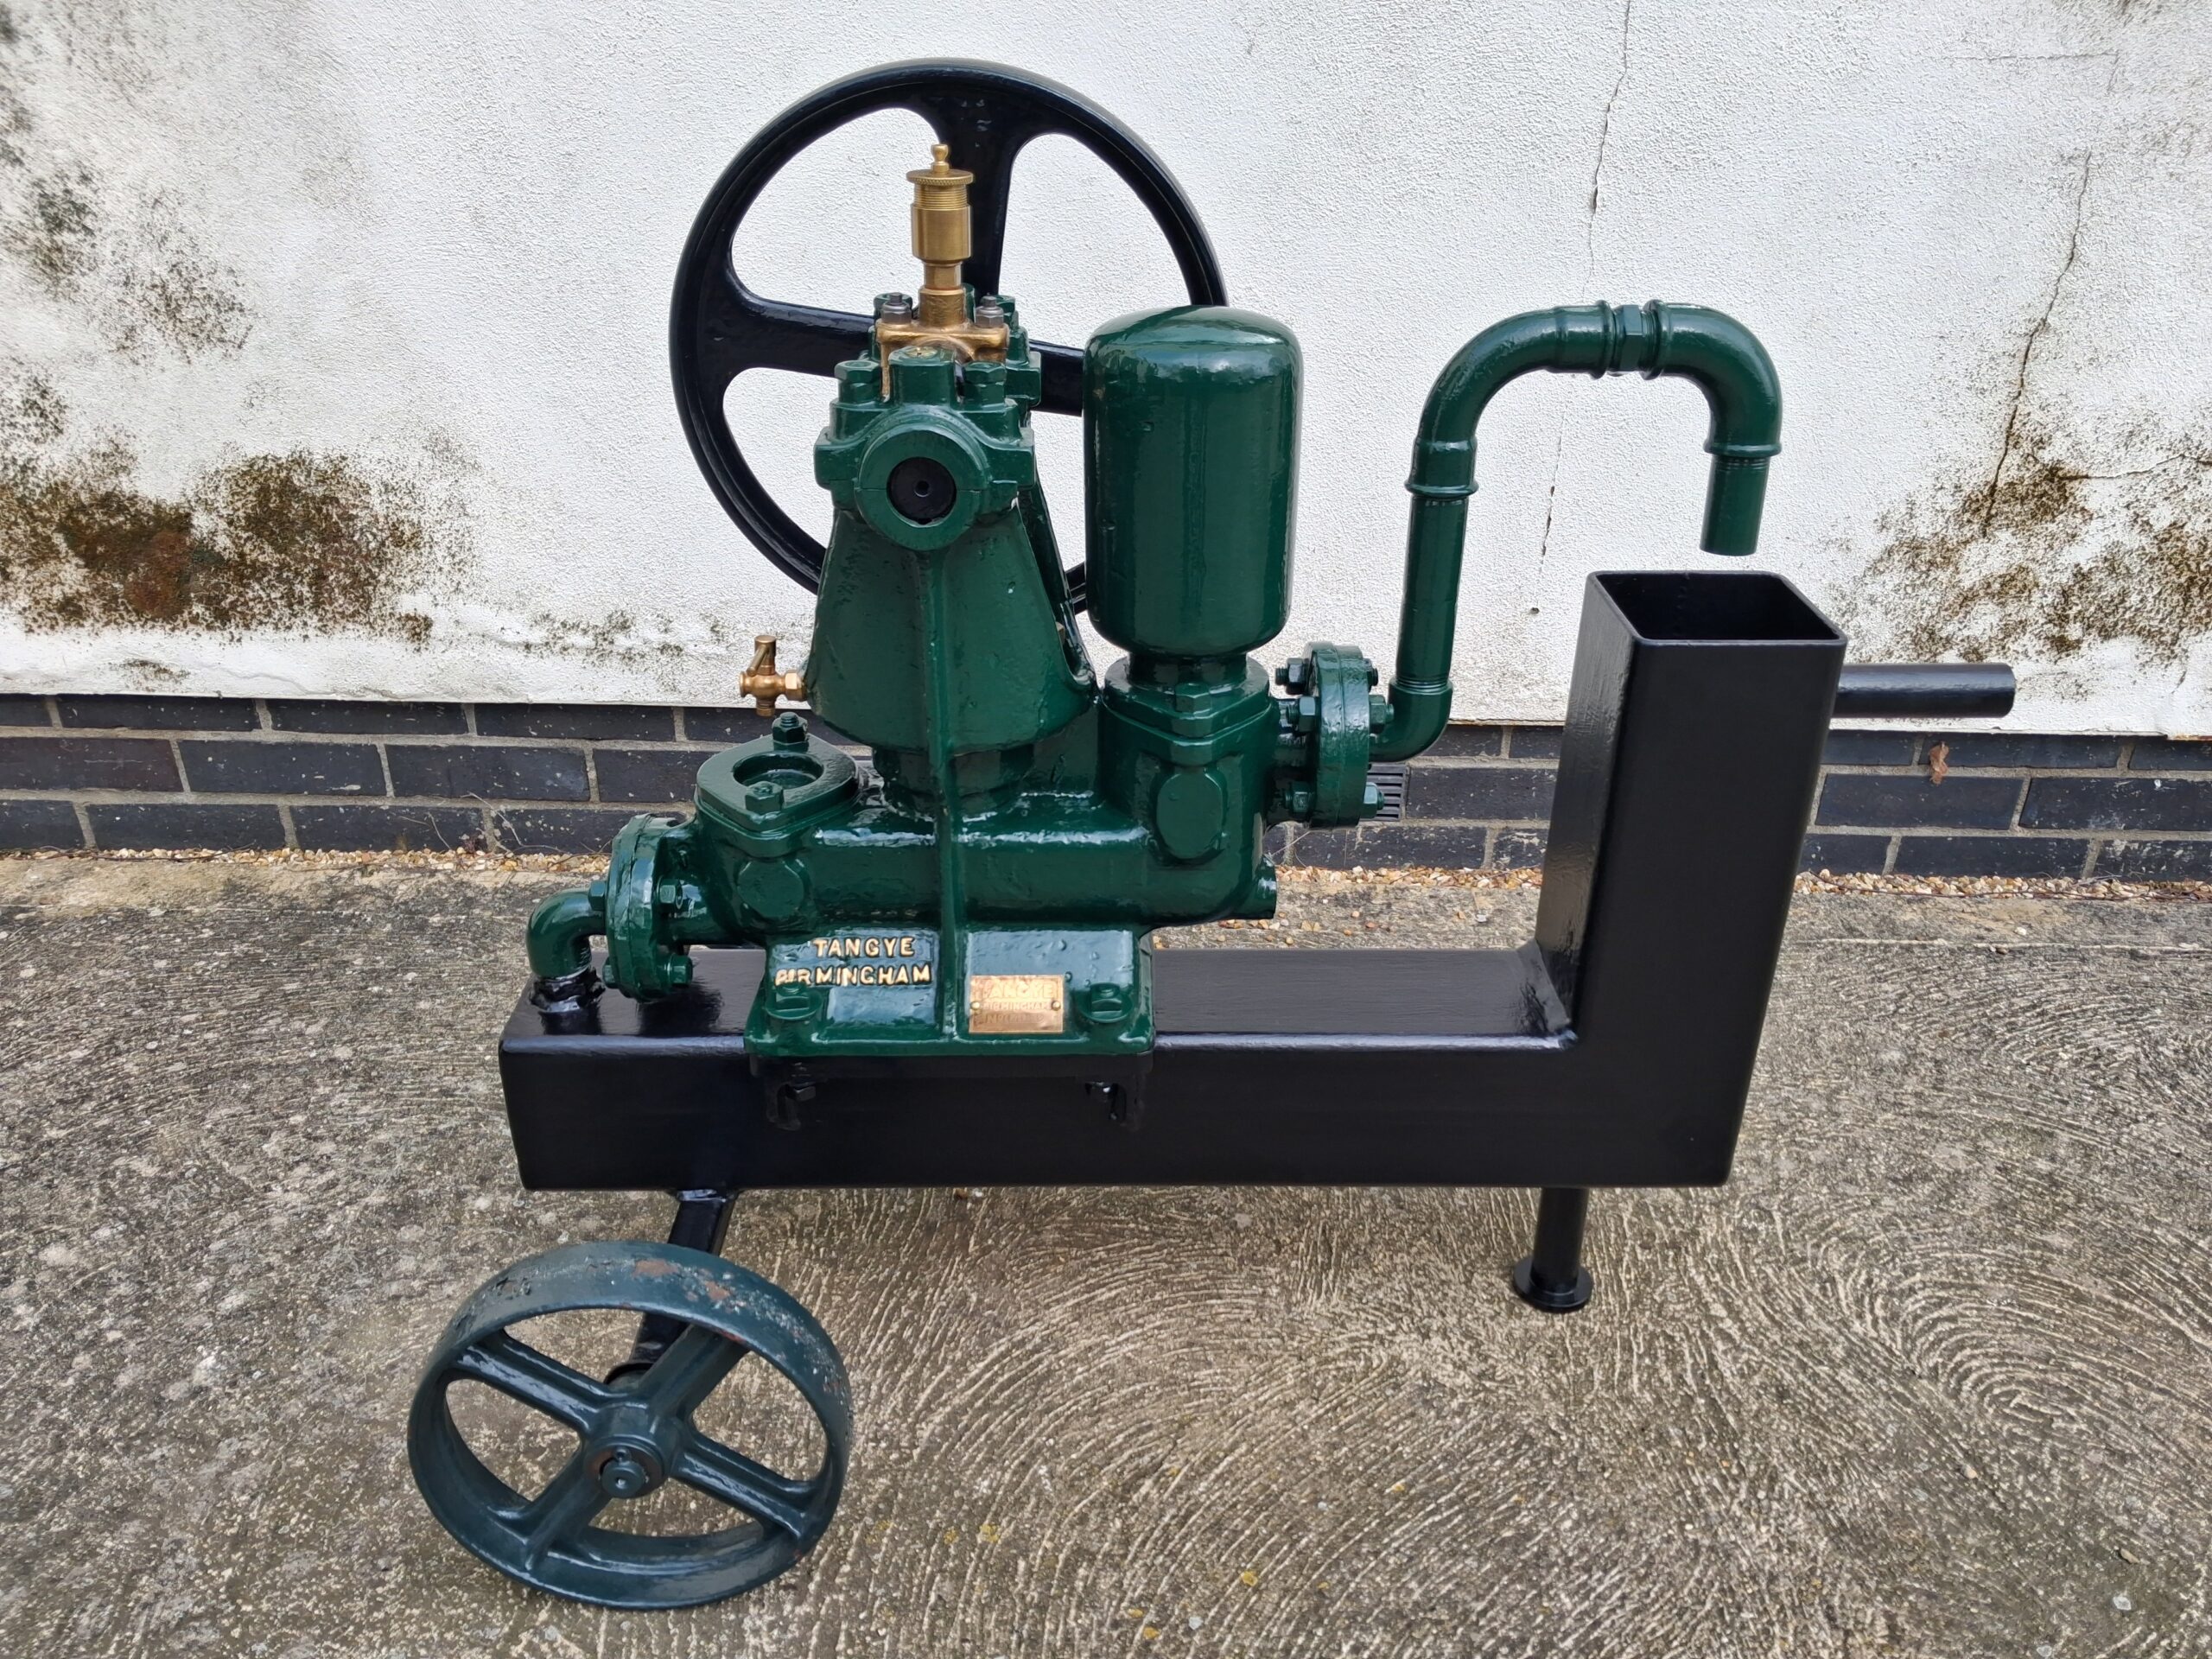
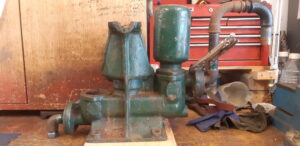
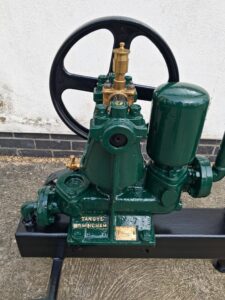
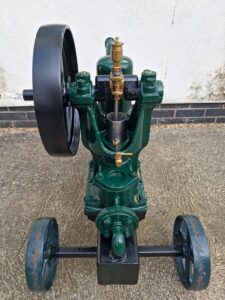
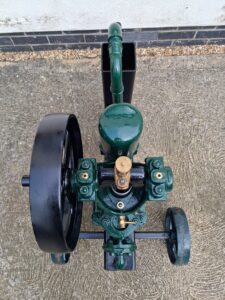
The last pictures show the completed pump. It was a lot of time and effort to rescue a simple water pump however I am pleased how it turned out. It is now ready to be used and enjoyed on a rally field.
This pump can now be found listed for sale HERE.

You must be logged in to like this post.
Country: GB